ExpressionEngine for Designers: Displaying and Resizing Images
Category: ExpressionEngine - Published: Oct 25, 2011 - Tags: expressionengine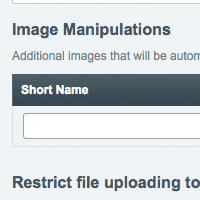
Uploading and displaying images in your entries is an essential part of any content management system. With ExpressionEngine 2.2.2 (I think) new tags were created to allow for easy resizing and cropping of images. In this post I'll go over how to set up your File Upload Directories, create new re-sized images for use in your templates as well as the markup to display the resized images in your templates.
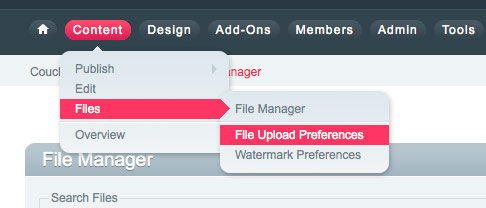
The first thing to do (if you haven’t already) is set up your File Upload Directory. Go to Content > Files > File Upload Preferences:
Fill in the necessary information:
- Descriptive name of upload directory
- * Server Path to Upload Directory
- * URL of Upload Directory
- * Allowed File Types
If you do not know the full server path, create a new php document with this:
<?php echo $_SERVER['DOCUMENT_ROOT']; ?>
Upload it to your root directory. Now view that new document in your browser and it will give you the server path. It should look something like: /www/home/html. After that fill out the rest of the structure so it ends up pointing to the correct directory for example: /www/home/html/images/uploads/thumbnails
If you are going to place those images in a new directory remember to add it to your server, ExpressionEngine will not do it by default. Also, remember to change the permissions to 7-5-5.
Most of the other fields can be left blank. One that I recommend entering a value for is Maximum Image Width. Set this width to the width of your content area. Images will be resized if wider than the amount specified, which keeps images from being larger than the content area they are in and breaking the layout of the page.
Scrolling down to the bottom of the page you will see Image Manipulations. This is where you can specify which duplicate images will be created and what size they will be. A typical use for this is creating thumbnails.

Finally hit update at the very bottom and you are done. A shiny new File Upload Directory has been created.
Creating the Channel Field for Your Images
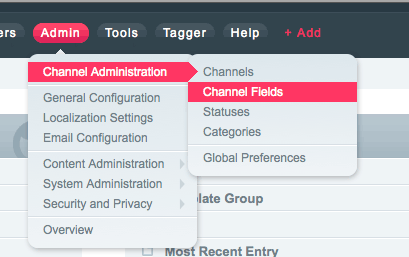
Go to Admin > Channel Administration > Channel Fields: Select the Field Group or create a new one.
Now Create a new Channel Field.
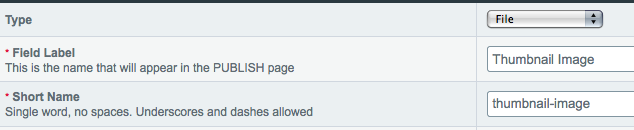
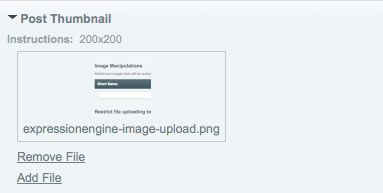
I created a new Channel Field with a type of File, a title of “Thumbnail Image”, and a short name of “thumbnail-image” (remember the short name for later).
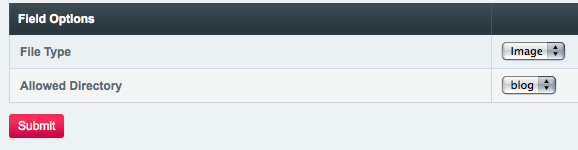
Now select the file type, if you want only images to be uploaded. Also, select the correct File Upload Directory so your image will be re-sized with the Image Manipulation you created earlier.
Implementing Re-sized Images in ExpressionEngine Templates
Now that you have created an upload directory, set up your Image Manipulations, and a custom field and assigned it to your Channel, lets add that re-sized image to a template. In the template you wish to display your entries, you can add this code.
{exp:channel:entries channel="channel_name"}
<h1><a href="{url_title_path='channel_name/template/'}">{title}</a></h1>
<img src="{thumbnail-image}{path}_thumb/{filename}.{extension}{/thumbnail-image}" alt="{title}" />
{/exp:channel:entries}
Which will be get outputted as:
<h1><a href="http://yourwebsite.com/channel_name/template/url_title'}">The Entry Title</a></h1>
<img src="http://yourwebsite.com/images/uploads/_thumb/image-name.jpg" alt="The Entry Title" />
Obviously you need to replace “channel_name”, “template” and “thumbnail-image” with your own information.
As you can see, instead of using just the custom field name “thumbnail-image” we’ve used a tag pair. Inside the tag pair: “path” is the server path to the upload director where the image is located. ExpressionEngine creates a new directory inside the upload directory you specified called _thumb, which is the name we used in the Image Manipulation field (the underscore is always added on the front). “File” is the name of the image file. Then lastly, extension is the extension (example: .jpg, .png).
Adding the Original Image to Your Templates
Above I gave an example of how to display a re-sized but if you want to display the original image you can do so as well.
{exp:channel:entries channel="channel_name"}
<h1><a href="{url_title_path='channel_name/template/'}">{title}</a></h1>
<img src="{thumbnail-image}" alt="{title}" />
{/exp:channel:entries}
Which will be get outputted as:
<h1><a href="http://yourwebsite.com/channel_name/template/url_title'}">The Entry Title</a></h1>
<img src="http://yourwebsite.com/images/uploads/image-name.jpg" alt="The Entry Title" />
Because the Image Manipulation uploads an image into a new folder (_thumb), the name of the file stays the same. So instead of using the template pair just use the single “thumbnail-image”.
There You Have It
So in this little example we 1) created a File Upload Directory 2) created an Image Manipulation that re-sizes uploaded images 3) created a Channel Field for the image 4) added the re-sized image to a template to be displayed on your website. All you would have to do from there is create some entries, and you are good to go.
There are a number of Addons that deal with getting images into ExpressionEngine and manipulating them. A few of the more popular ones being:
- Channel Images by DevDemon
- Assets by Pixel and Tonic
- CE image by Causing Effect
All of which have additional functionality over what comes with EE by default but they also come with a pricetag. Depending on your needs, you may only use the built in functionality, but if you do need something extra, those are a few good places to start looking.
Have any questions leave a comment below. If you have a suggestion for another topic, visit the contact page and send me a quick email, and I’ll try to accommodate the request.